Milkshape3D 1.8.2 howto
For the Chilean community by !nFerNo
Milkshape3D is a commonly used 3D modelling program for low-poly models. It can be used to create, convert and view 3D models. This is a quick tutorial on how to make your own model. This tutorial does not include how to animate your model or how to unwrap it. For the unwrapping tutorial, click on the LithUnwrap tutorial on the left.
You can download everything you need for this tutorial here:
The image of the dagger (right click, save as)
Milkshape3D (30-day trial version or 25€/35$ for the full version, which includes every new version and update)
The Basics
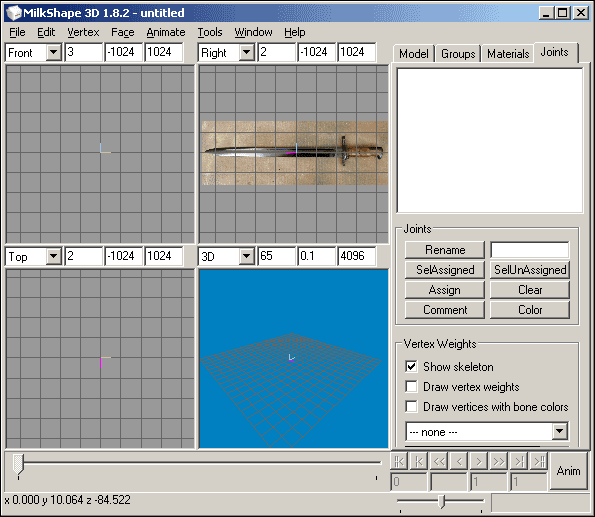
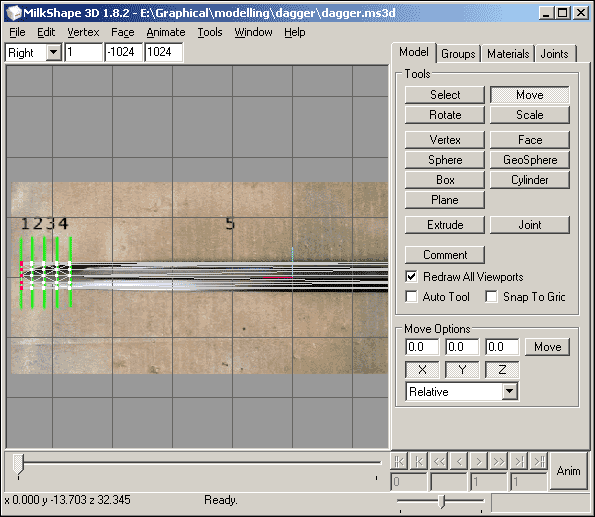
When you first open the modelling program you get to see the following screen.
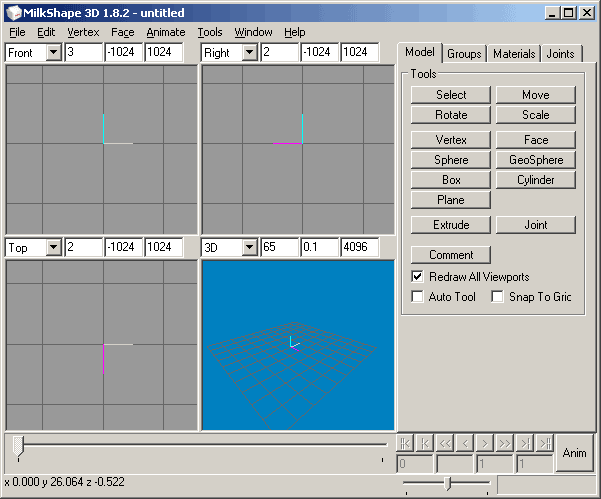
This screen contains 4 viewports to the left and a set of basic tools to the right.
In the bottom right corner we see the animate button, which we won't be using in this tutorial.
Note: I have "Viewport Caption" enabled. If you want your screen to look exactly like the picture above, click Window > Show Viewport Caption.
The top right corner contains 4 tabs:
- Model
- Groups
- Materials
- Joints
The "Model" tab
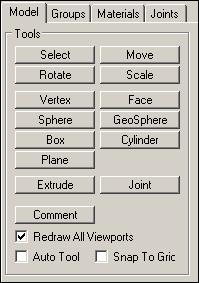
The first group of buttons ("Select", "Move", "Rotate" and "Scale") are used to manipulate the 3D model.
The next group of buttons ("Vertex", "Face", "Sphere", "GeoSphere", "Box", "Cylinder" and "Plane") are used to add new 3D shapes to your 3D model.
The last pair of buttons ("Extrude" and "Joint") are used to manipulate the 3D model ("Extrude") and to create a skeleton for animating the 3D model ("Joint").
The "Groups" tab
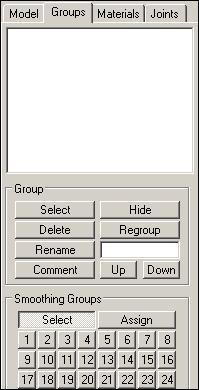
The white area will list the Groups that you have created. Groups can have names such as "Cylinder01" or "Box01"
The buttons below the Groupslist help you to keep your list tidy and clean.
Smoothing groups are used to make your model look more "smooth". This can be used to remove dark spots on an even surface. More about this later.
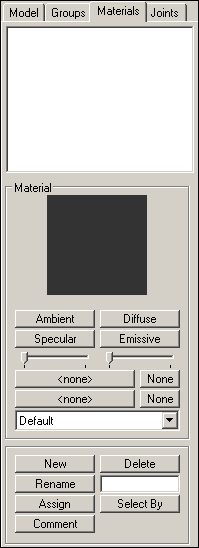
The "Materials" tab
The materials tab is used to skin the model while you are modelling it, roughly. I won't be covering this as we will unwrap our model using LithUnwrap. You can find the LithUnwrap tutorial in the navigation of this site.
The "Joints" tab
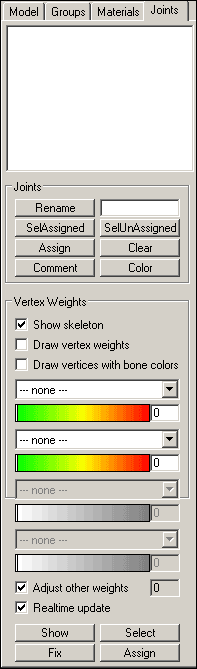
This tab is used to control the "Joints" or "Bones" of a model. Again, I won't be covering this in this tutorial.
Let's start!
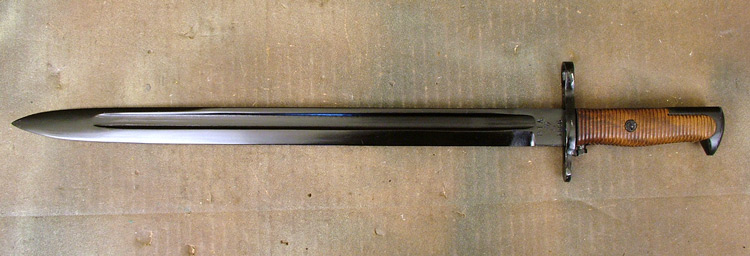
Somebody posted a picture of a dagger on the one.cl forums, which we will be using as our reference image.
You always need to use a reference, wether you are holding it or you are modelling from an image. It is much easier to model this way, plus it provides you an accurate model. If you want to make a fictional character, house or object of any kind you're still better of drawing a few "concept art" pictures first and using this as your reference.
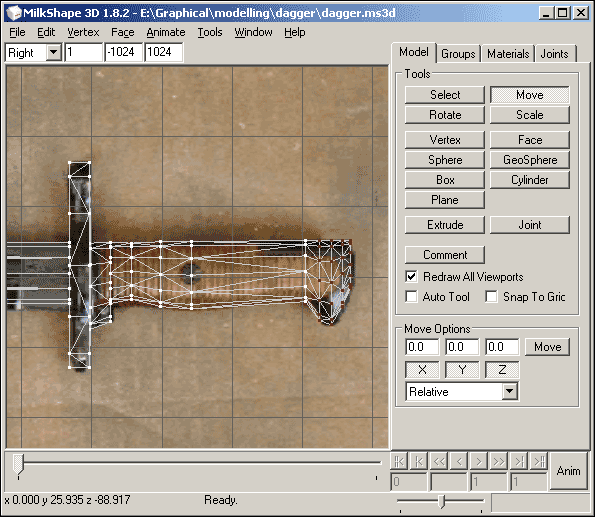
The picture of the dagger shows us the left/right side of the object (whatever you call left or right on a dagger), so let's right-click on the top right viewport (called "Right") and select "Choose Background Image...".
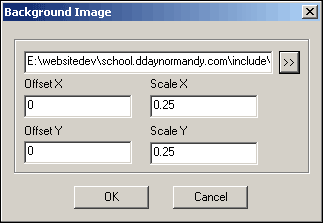
In the next dialogue you get the option to choose an image to place in the viewport.
Click the ">>" button to select the file. Once selected click "OK" and your image should be in place in the viewport.
Your screen should look like this now:
Now click on the "Model" tab and select "Cylinder".
Before we continue we need to look at the dagger. We will use a cylinder to create the blade of the dagger.
A cylinder consists out of "Stacks" and "Slices". A stack is 1 round block, a slice determines how round a stack is. The higher the value, the rounder it gets, but I usually don't go over 12 for slices.
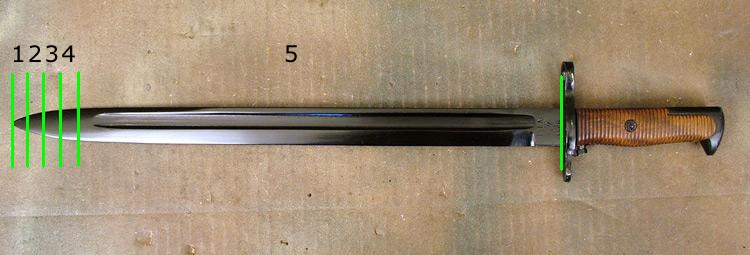
Back to the dagger: by counting the ammount of the times we need to bend the Cylinder in shape (you'll understand soon) we can create the correct cylinder in 1 try.
Note: if you made a cylinder and you are 1 stack short you can always extrude this, but sometimes the overlapping vertices can make it hard to select the surface to extrude. If you didn't close your cylinder, it is impossible to extrude anyway.
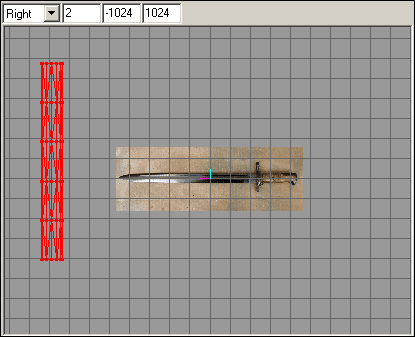
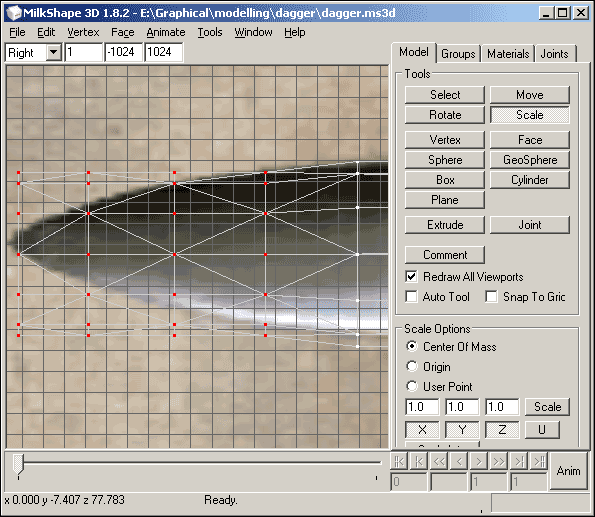
This picture shows how many stacks we need. We will make every stack smaller and smaller so it creates the point of the dagger. In total, we need 5 stacks, and we will use 12 slices per stack.
So click on Cylinder, then enter the values in the corresponding boxes. In the dropdown box we will select "Close with extra vertex" for now. You can try out the other options and see how they look later.
Now left-click in the viewport with the reference picture and drag until you see a cylinder. Make it long so you can see all the stacks clearly.
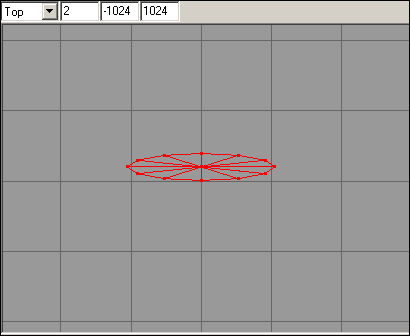
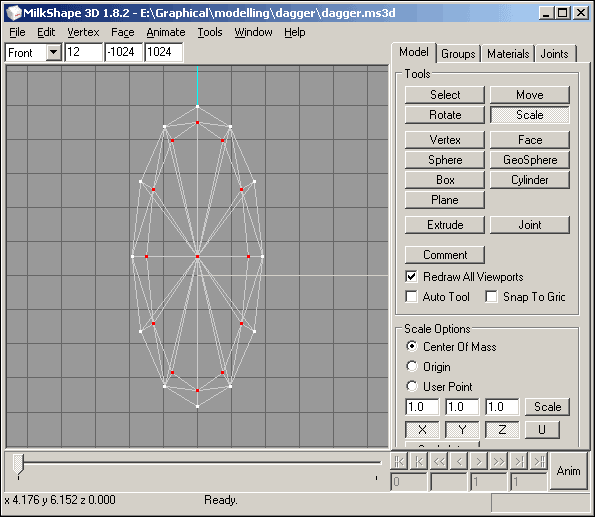
You will see that the cylinder is standing up, but we need it lying down. Before we rotate it, we have to give the cylinder a more "knifey" look. So click on "Scale", left-click in the "Top" viewport and drag your mouse upwards so the cylinder gets flatter.
Next, we can rotate it so it fits on top of our reference picture. Select Rotate and rotate it until it fits. You may want to rotate it on the viewport of the reference picture and the "Front" viewport. Then lay down the cylinder with "Move" over the blade of the dagger. Lastly, scale it so it fits by using "Scale". Again, drag to scale it. Alternatively you can enter scaling values. This is a very valuable option. If you like your cylinder as it is, I advise using values and pressing the "Scale" button. Use "0.9" on every axis to avoid scaling too small.
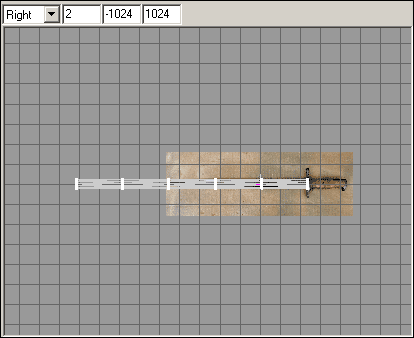
My model is too long, but that's ok, click on "Select" and at the bottom of the "Model" tab click "Vertex". Click and drag over the Cylinder so you cover it completely EXCEPT for the vertices that are near the handle.
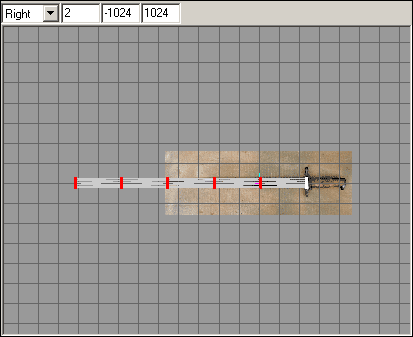
It should look like this:
Now every "red line of vertices" should match the lines we drew earlier. Normally you'd keep these lines imaginary, but we can use the reference picture with the green lines for help. Just replace the image as if you'd insert a new one (this is good practice as well).
After you've changed the picture you can put the vertices in the same place as the green lines. You can move everything and deselect the last vertices everytime to get the result we want, using ALT+right-click and drag the mouse.
Let's switch back to the reference picture without the green lines, because they are blocking our view at the moment. Again, we normally don't use the picture with the lines, you can just "imagine" these lines to be there in the future, it's just more clear to use these in the tutorial.
Now we need to scale the vertices again so it narrows towards the point of the dagger. Select all the vertices from stack 1 to stack 3 and scale them so stack 3 "touches" the blade on the reference picture.
Repeat this step for all the other vertices. Deselect the ones on the right and move on to the left, again using ALT+right-click and dragging the mouse. Don't forget to narrow the vertices too, by scaling them on the "Front" viewport as well everytime before moving to the next set of vertices! For the last vertices (the ones on the left), click on the menu Vertex > Snap Together, and Vertex > Weld Together, this puts all the vertices in 1 place together, making the point of the blade. You should always Weld after Snap. It's best you do this, to avoid bad smoothing groups.
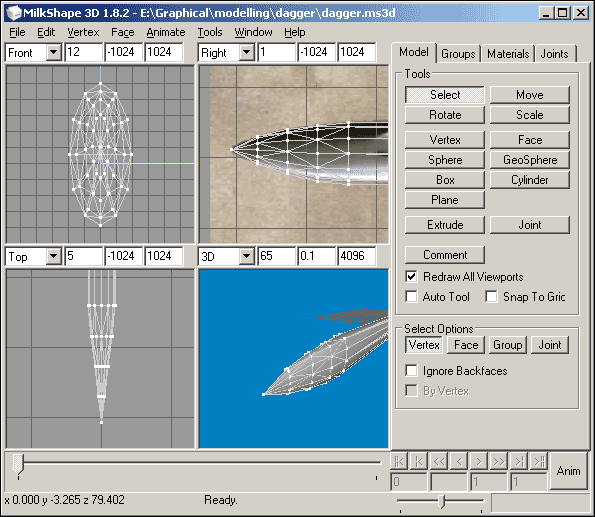
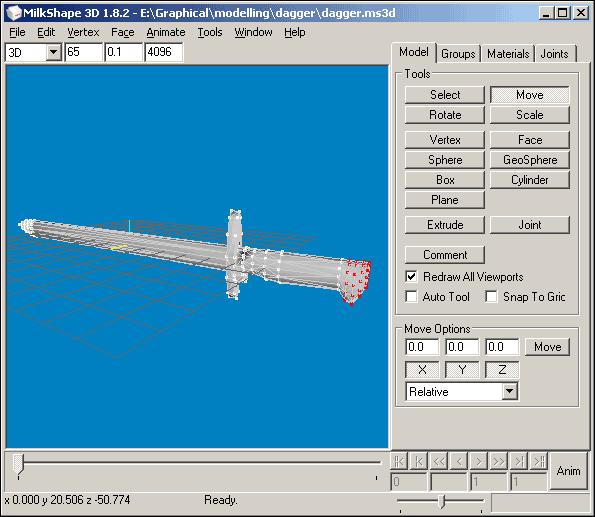
After doing all the vertices our model should look like this:
Now you should do the same with the other part of the dagger, the handle. See how many stacks you need and make a cylinder. Then scale and move this cylinder until it looks like a handle. Then move both cylinders together and you've got your model!
Hint: for the handle, I'd use a 12 stack cylinder with 12 slices per stack.
I'm going to let you do the rest of the dagger, as you'd obviously learn more by experimenting yourself!
You almost always need to start with one of the basic shapes and edit this to look like the thing you need.
You could make a model fully by placing vertices using "Vertex" instead of "Cylinder", but this is extremely hard to make a complete model. I only use the "Vertex" tool to make slight adjustments. To make a face, select 3 vertices and press "F". If you do this, you will see that if you want a complete model, you will need to do a lot of "Create Face" ("F"), which is imho insane.
I hope this tutorial sparks some interest into modelling for Quake2 and other low-poly games.
If you have questions, you can always contact me via mail at infy [dot] inferno [at] gmail [dot] com.
This is 5 minutes later:
- !nFerNo |